
How To Add Department
Click On “Department.”
When you click on the department section, it shows you a new window.
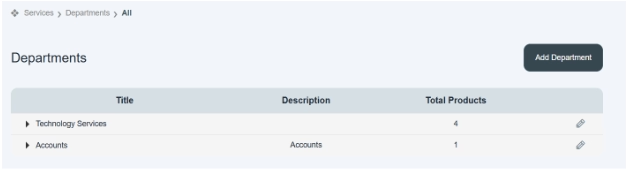
- There you can see a table is given, consisting of summarized information related to already existing department accounts.
- In tables there are columns of Title, Description, and Total Products, and the edit option is located there.
- These columns have expandable sections. Clicking on it will open more options as drop-down subsections.
- Also, it shows you the total number of services a department is providing.
- There is a button located on the top right side of the page. i.e., add department.
Click On “Add Department” Button
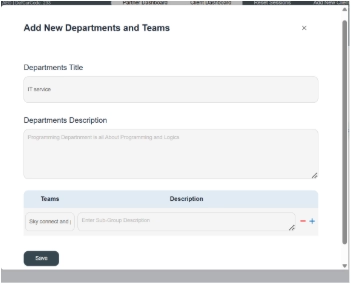
When you click on the Add New Department option, it opens up a pop-up window in front of your screen.
- First enter the department title name or group name to which the service belongs in the given space. E.g., the department name is IT service.
- Enter a general description in it.
E.g., from where the product belongs, the user can write in it. (The description box is optional here).
- Below there is a table given; you can add a subsection in it. Write the subsection service name in it, e.g., Sky Connects and Pro Plan.
- Mention any description related to product department information.
- You can remove (-) or add (+) more subdepartments under a specific head.
- Click on the Save button to save the information successfully.
Once you save the information, the new brand/group title is shown in the existing brand list.
