
Steps to Convert Work in Progress into Finished Goods
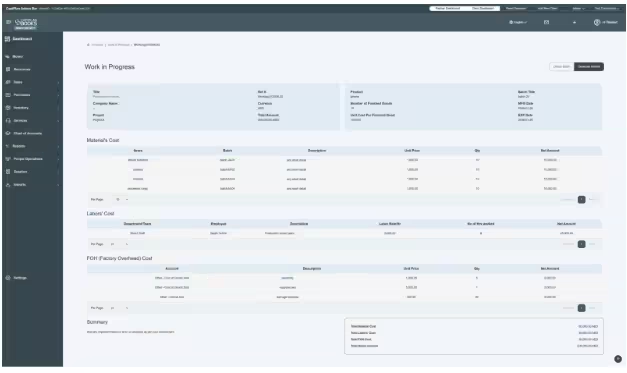
To convert your product from a work-in-progress state to a finished product or to change its status to “Completed,” you have to first open the specific WIP. Here I opened the same WIP that we made above. Click on it, and it will show you details that you entered before.
Analysis
Here on the above page, it will show you every detail of the work in progress. First, there is a basic information column given.
On the other hand, it shows you product details such as product, number of finished goods, unit cost per finished good, and batch information. This column information will be updated once the product is converted into a finished product.
Below this page, all the details of the cost involved are given. Also, the user can check the financial summary given at the end of the page.
Now click on Convert to Product
When you want to convert the WIP into finished goods, open the specific WIP; there is a toolbar given on the top right side of the page having three options.
- Edit
- Delete
- Convert to Products
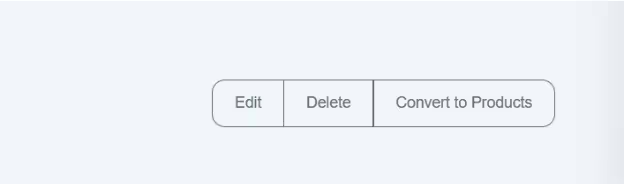
- Edit option—Through this option, you can edit the WIP information. Once you edit all the changes, click on the save button. Updated information will save.
- Delete—If you want to remove or delete any product WIP information permanently from the system, click on it and give confirmation. Specific product work in progress will be deleted from the system.
- Convert to Product
Now the actual process starts; click on the “convert to products” option.

Click on it, and it will open a new window in front of your screen.
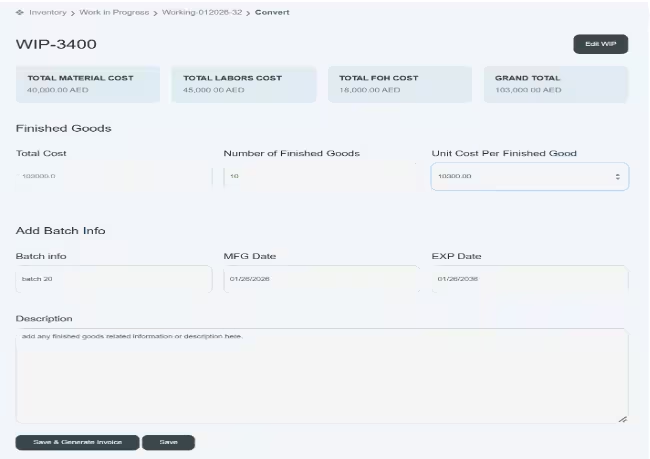
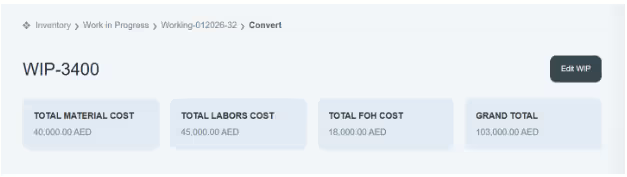
Here you can see first there are various tabs given, which show you the following information.
- Total material cost—shows you the total cost of raw material used in manufacturing.
- Total Labor Cost—shows you the total cost of labor that was involved while in manufacturing.
- Total FOH Cost—shows you all indirect expenses that happened or were involved in the production of goods.
- Grand Total—showing you the ending balance, the sum of all costs.
There is an Edit WIP button that is still given. Users still have access to edit any work-in-progress information.
Finished Goods
Finished goods are products whose manufacturing processes are completed and are ready for use.
On this page, now all the finished goods information will be uploaded. Explanations of the following fields are given below.
- Total cost—this field shows the entire cost of manufacturing. E.g., AED 103000.00
- Number of finished goods—enter the quantity of products that are completed and ready to sell, e.g., 10.
- Unit Cost Per Finished Good—the overall cost incurred to convert the per unit into finished goods. E.g., AED 10300.
Add Batch
As mentioned above, batch information will be updated once the product becomes ready for sale. Now we add its batch information in the following fields.
- Batch info—it refers to the specific batch of finished goods produced at one time. e.g., batch-20
- MFG date—enter the manufacturing date of goods. E.g., 01/26/2026
- EXP date—enter the expiry date of the product, e.g., 01/26/2026.
- Description—Enter any finished goods-related description here.
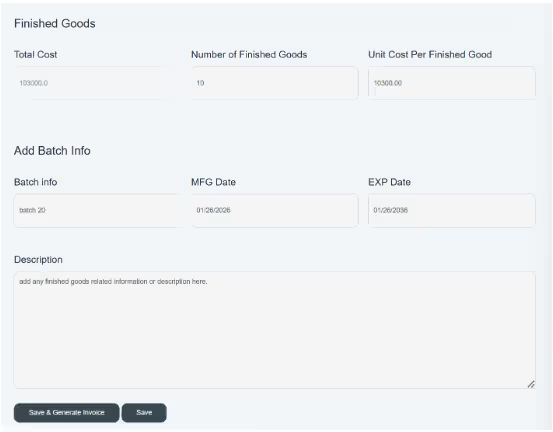
At the end there are two types of save buttons given, i.e., Save & Generate Invoice or Save the information.
- Save & Generate Invoice—When you click on Save & Generate Invoice, it will save the information and directly give you access to immediately generate an invoice against the required customer.
- Save—When you click the Save button, the system stores the information and displays it on the WIP main page. After reopening the record, you can either generate an invoice or delete the batch, but your WIP status will only change when all the products are completed and recorded.
- Once the WIP invoice is marked as paid, the user can only edit or make any change unless they delete the batch. After deleting the batch, it will allow you to update the information and save it and generate invoices.

Click on Generate invoice
- When you click on generate invoice, it will allow you to create an invoice of the same products/items against any customer.
- The remaining process is the same as mentioned in the invoices section.
