
Procedure To Record Current Assets in Capi Plan Books
To record an asset, user have to follow the navigation path to register it under its relevant category in current asset module.
Go to the Chart of Accounts → Current Assets and then book the bill against the asset. After the bill has been successfully recorded, return to the current asset page to registered the asset under its relevant category.
User have to follow this path to register an asset under current asset module.
Navigation path: Non-Current Asset → Create Head → Purchase → Bill → Add Bills → Back to Non-Current Asset head → Create an Assets.
Follow the steps as explain below.
- Create Current Asset head
Go to charts of accounts, click on current asset head. When you click on current assets sub head, it shows a new window having asset accounts that are expected to be used or converted into cash within a short period (usually less than 1 year). These accounts are added by default. User can customize or edit assets accounts as per need.
Table Summary
There are a table shows you summarized information of every head. It consists of columns such as head name, description, total products and total Amount.
Head name → shows you the asset account name that are expected to be used.
Description → Extra details about the account.
Total Products → Number of items under that head.
Total Amount → Total value of that account.
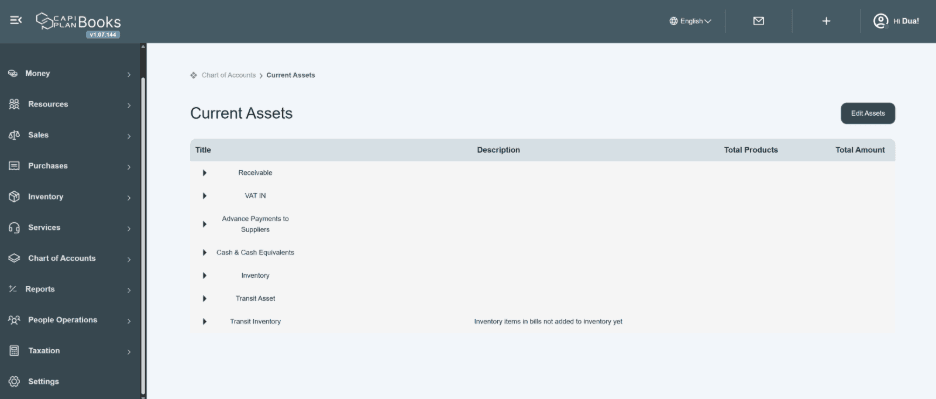
There is an Edit button located on the top right side of the page given to create an asset.

Click on Edit button
- When you click on edit button, it will open a new page.
- This page allows you to create new head or edit head tittle name in it.
- There are two columns given i.e. Head name and description in a row.
- Enter new head title name in first section. E.g. Pre-Paid Expense.
- If you want to enter any description related to head or assets, write in description box. This description box is optional.
- There are add in (+) and remove (-) option available to add or remove asset head rows.
- There is a plus icon
 given to add or remove more sub layer.
- Add Sub-Heads with their descriptions.
- Use (+) to add multiple sub-heads if needed.
- Use (-) to remove the sub heads if needed.
- Now click on save button, new information will be saved in system and added in front table.
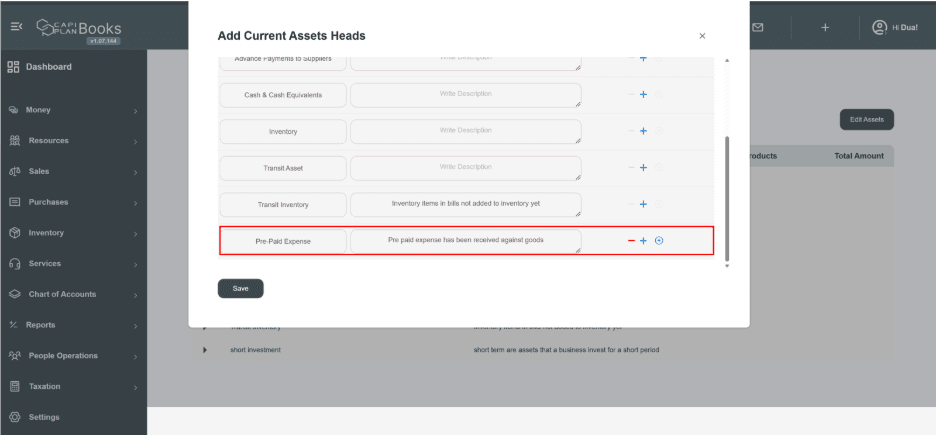
Once you click on save button new information would be display on front page of current Assets.
Here you can see required account head are created in the form of expandable sections. User can add asset multiple assets head under specific account head.

If You Want to Add Multiple Assets Rows in a Common Head
- There is a plus icon given to add or remove more new rows to add more assets heads name.
- Add Sub-Heads with their descriptions.
- Use (+) to add multiple sub-heads if needed.
- Use (-) to remove the sub heads if needed.

- Book a Bill Against the Asset
After creating the current asset head name, record a bill against this asset. This requirement is necessary to record a bill against a specific asset because when a company buy an asset, it is treated as a purchase or expense. Therefore, it is essential to record the corresponding bill in the system to properly account for the transaction.
Please Remember: to book the bill for create an asset, select “others” in the item field and only then it will allow you to select the account category in the “account” field which will show you current asset category in drop down menu. Select that asset category. Once you select and fill all the information, it will allow you to create asset under its required head.
For this purpose, it is required to create a supplier in the Resources section from whom you are purchasing the asset.
Process to create a Bills
First go to the “purchase” module located in side panel when you click on navigation bar, there is a sub module given i.e. “bill”. Click on it and it shows you this window.
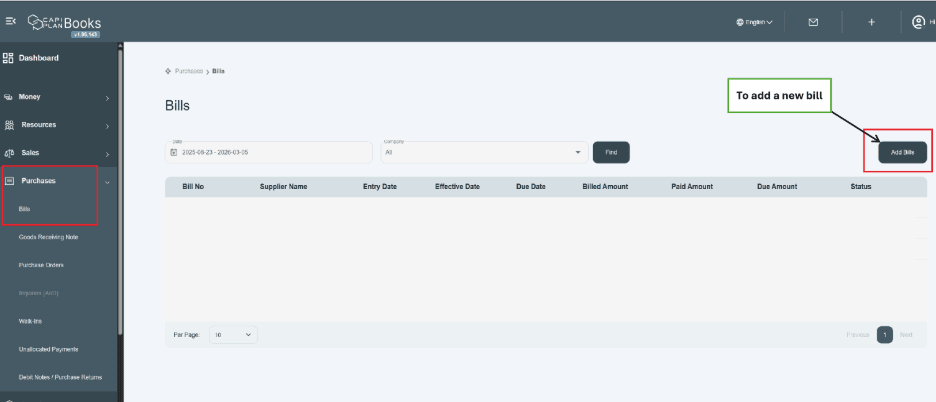
Click on add bill button located on the top right side of the page, it will show you a new window as shown below.
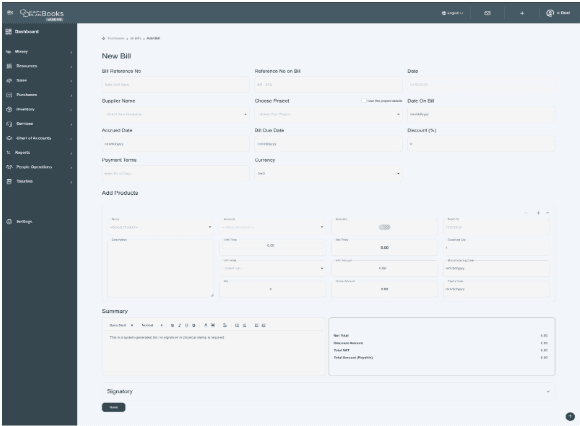
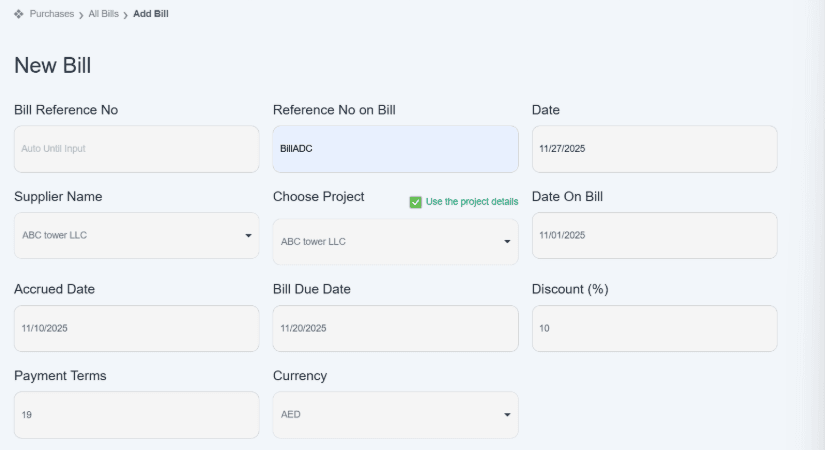
Fill the following information like this,
- Bill reference number is basically that number through user can track or identify the bill in future otherwise system will generate automatically as per default setting. For example; Bill-2026-100
- Enter reference number given on bill or this number could also generated by system e.g. Bill-ADC
- This Date is basically posting date which will already set as per default setting.
- Enter the supplier’s company name. e.g. ABC tower LLC
Note: to book the bill, user first create the supplier in the Resources section. If the supplier has not already been created, you can directly access the option by typing the supplier’s name in the Company field dropdown. The system will display an ‘Add New’ option. Click on it to create a new supplier company name or go to section- How to add Supplier’s Company Name while creating bill
- Click on project, if you want to link any specific bill to a specific project then choose that project from existing category given in drop down menu and if you want to add new project then go to section – How to Add New Project Name while creating bill and follow the instruction
- Use Project Details – Check this box to auto-fill details from the selected project.
- Enter the Date on Bill, on which order is place. 11/01/2025.
- Enter the Accrued date means on which date user receive the bill. E.g. 11/10/2025.
- Enter the Bill Due Date means deadline to pay the supplier bill before or on 11/20/2025. After that due date, it becomes overdue.
- Enter the Discount (%) rate if you received any discount on bill. E.g. discount rate is 10%. But if you didn’t receive any discount from supplier then
- Enter the Payment terms mean number of days the bill remains valid. E.g. 19 days.
- Enter the Select the currency for the quotation (e.g. AED).
How to Add Product in Bill
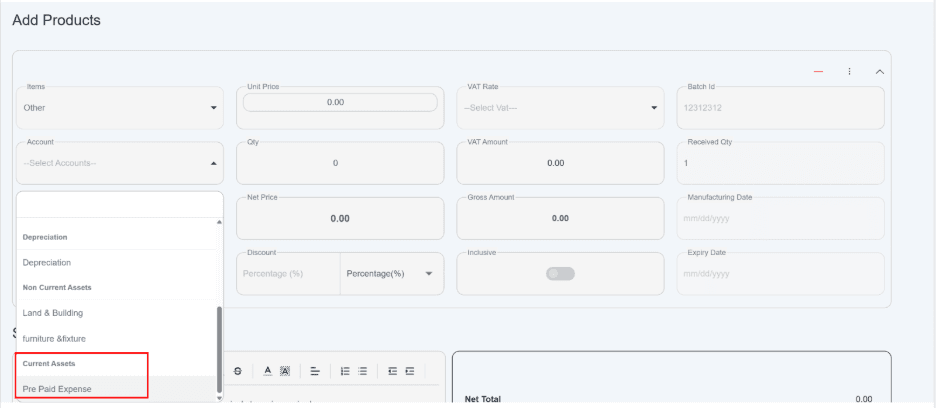
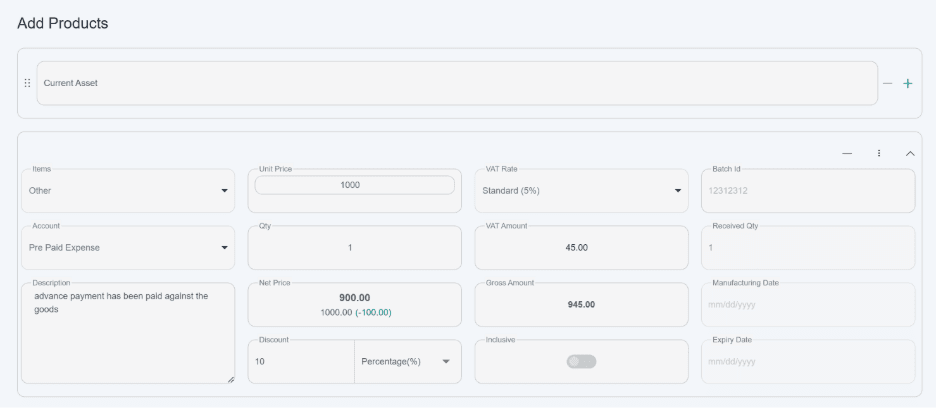
- Click and select the items from the dropdown list. Here you have to select the “other option” in order to select the account code. when you select other option in item, it will give you access to assigned the required current assets category to its respectable account head.

- Enter Account name. Select “others” in item section, allow you to select the account code in respective category as per your requirement. e.g. Under the current assets category.
Please Note: If you don’t find your account code in drop down list then go to “charts of accounts”, click on Profit and loss sub head, A new page will open which will allow user to create a new account head or edit account head under default categories by clicking on Add new Head.

Here I’m selecting “pre-paid expense” under non-current asset head as an example.
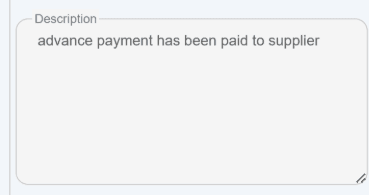
- User can also enter description related to an asset. E.g. advance payment has been paid to supplier.
- Mention the unit price of a current asset. E.g. AED 1000 (as advance payment)
- Enter the Quantity of current assets. since you are booking bill against the expense, so that put the quantity as 1
- Net price will be automatically calculated.
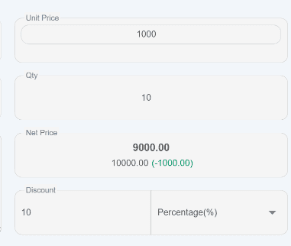
- Discount- Enter the discount if you received any discount on bill. user can enter that information like
Use Percentage → when giving standard discounts (like 5%, 10%)
Use Flat → when giving exact amount off (like discount of 50 AED is given by the AED)

- Click and select applicable VAT rate from drop down menu. e.g. zero, exempt, no vat, 5%, Export 10, standard. This determines how much VAT is applied.
- Automatically system will calculate Vat amount. e.g. would be AED 45.00. This price is based on unit price, quantity and vat rate.
- Gross amount will automatically calculate and shows you total final amount including vat. e.g. AED 945.00 as given in example.
- inclusive checkbox, here it works like – in unit price VAT amount is already added. Here system only deduct and calculate the original price of product and calculated VAT amount from the unit price.

- when you click on, the inclusive button, it means Vat amount is deducted from total amount. And when you click Off, the butt it means Vat amount is Included.
| Option | Meaning |
| ON (Red) | VAT is excluded from unit price |
| OFF | VAT is included in unit price |
- Batch id, manufacturing date, received quantity and expiring date these options will disable when you select “other” in “item” field. But remember this will happened only when you want to book the bill against charts of accounts.
- There is a swipe up feature is given on the left side of the row. This option is given for user convince to arrange the sequence of the items as per their preference.
- Now this all for the information to add product row.
- This is the method to enter information in the “Add Product” block up to this point.

- If you want to add multiple “Rows or header” on the top
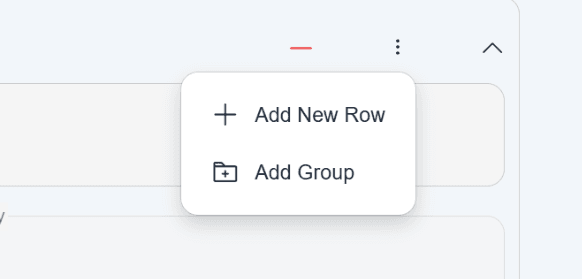
Now on the right side of the row, there are options available through which user can add common header, remove or add new rows, collapse icon and more three dots menu button  are given to add multiple rows or categorized information in bills.
- Remove (-) button– given to remove the rows.
- Collapse button– given to minimize the product section.
- Click on “three dot Menu” button
Click on it, shows you drop down options which are explained below.
Add New Row
- Purpose: To insert a single new row in the table or list.
- Use Case: When you want to add a new individual item, record, or entry.
- Example: Adding a new product, a new transaction, or a new line item in an invoice.
Add Group
- Purpose: To create a group or category within the table.
- Use Case: When you want to organize multiple rows under a common heading or category.
- Example: Grouping products by type, grouping tasks by project, or grouping inventory items by location.

Once you added any row or header it will look like this,
Summary
- Enter a Brief Summary in the designated text area to include comments, special instructions, or specific terms and conditions related to the bill. This section allows you to clearly communicate any additional details to the customer.
Users can also configure default terms and conditions in the system settings. Once set, these terms will automatically appear on every invoice, eliminating the need to enter them manually each time.
- On the right of table financial Summery is given which automatically calculated your net amount, discount apply on overall amount, before or after VAT amount and total payable amount.

Signatory
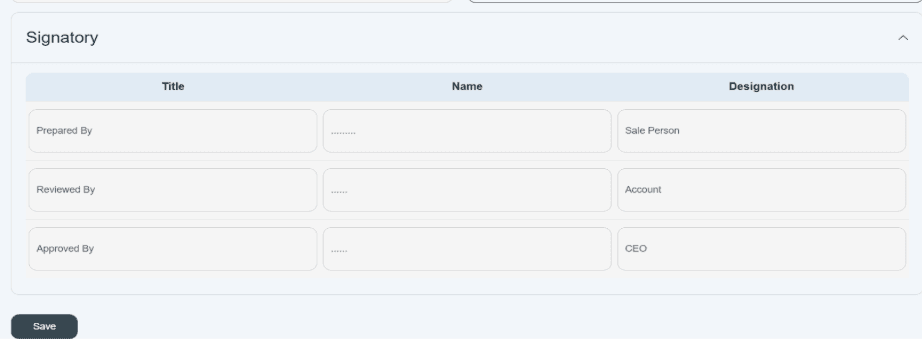
- There are three options given for the signature for responsible persons. Select the authorized persons or department responsible for approving or signing the proforma invoice.
- After enter all information successfully, click on saves the purchase and adds it to your records.
- After submit the form, all your information will appear on the screen in a summarized form.
- In list of suppliers, you can see all brief information and you can add new bill easily through the front page.
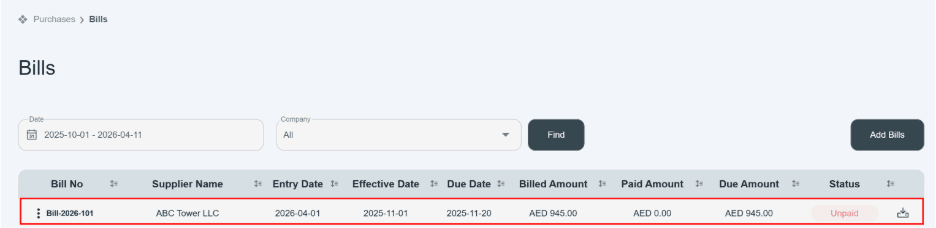
Please note that the bill status does not affect the registration of assets. You only need to record the bill against the relevant product, and then navigate to the Current asset page to validate the asset.
For payment processing, the user needs to click on the reference number to open the bill details for analysis. Then, click on the “Add Payment” button to proceed with the payment
