Actions buttons in PO
There are action buttons located on the top right side of the page, and there is an option given to create a GRN.
Buttons include edit, delete, download PDF, send email, duplicate, create bill, and create GRN.
Since we are learning the procedure for creating a GRN, we will focus only on that functionality here. If you would like to understand the remaining button functionalities, please go to the purchase order and its analysis section, where all features are explained in detail.

How to Create GRN
Please note that a Goods Receiving Note (GRN) is created only for products and is issued after the goods have been received. A GRN cannot be generated for services. The system will use only the goods-related information from the purchase order when creating the GRN and will not consider service or other non-product information.
To create a GRN, there is a button given, placed in the actions buttons of the purchase order; click on that button.
Click on the Create GRN
As soon as you click this button, the system will automatically create a GRN against the specific purchase order. A notification will also appear on the page confirming that the GRN has been created successfully.
This notification will be shown at the bottom of the page.
After creating the GRN, the system will automatically add the new GRN into the “Good Receiving Note module.” The user can review and analyze GRN details from there as well.

Good Receiving Note Overview
Once the Goods Receiving Note (GRN) is submitted, users can analyze the GRN details and submit the bill directly from the GRN section.
GRN details show you basic information of supplier like
- Supplier Details
- Summarized Product Details
- Instruction Related to GRN
- Action Button.

How to attach a document
Click on the Add document option given on the top right side of the document.
- You can attach a document of the bill as supporting evidence.
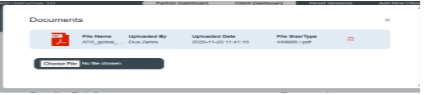
- If you want to attach a document, click on the button “Choose file” and click on it. A new page opens in front of you; select the file from the system and then upload it.
- The system will upload the document into it.
- You can see file details like file name, uploader, upload date, and file size, and a delete option is also given in a red icon.
- If you want to recheck the document, you can click on the “view details” option located on the right side of the document block.
- If you want to change the document, you can click on the “choose file” option and then select another file as per the requirement and then upload it and save it.
- It will display on the front screen of the bill.