
How We Allocate Unallocated Payment to Their Related Purchases.
After creating an unallocated payment, the user can see there are options located on the right side of the table given on the front page of the unallocated payment list. Options are Allocate | Refund | Split.
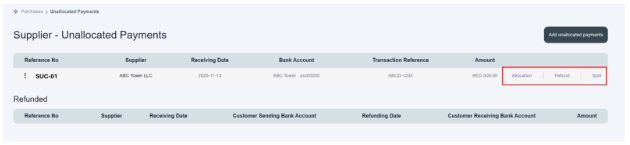
Allocation is basically meant for assigning payment to specific purchases or outstanding bills.
In simple words, when we send any amount against any existing purchase or related to one or more purchases, then we are allocating the payment, like we decide which payment is related to which purchase.
Remember: a user can only do allocation of any unallocated payment against an unpaid bill found against the supplier. If there is not any unpaid bill found against the supplier, it will not allow us to allocate any against any payment.
Now,
Click on “Allocate payment,” and you can see a new page open on it.
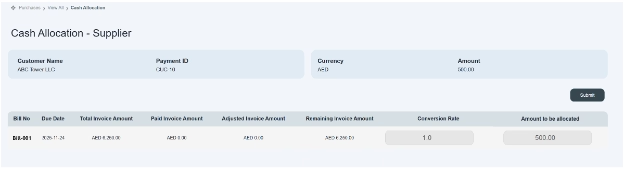
There is summarized information given on top of the page. There are such things as supplier name ABC Tower LLC, payment ID CUC-8, currency AED, and amount 500. mentioned at the top of the cash-allocated purchase.
- At the bottom you can see there is a table given, consisting of details of cash to allocate for purchases.
- Only unpaid bills will show here.
- There is information given about bill no., due date, adjustable balance, conversion amount, and amount to be allocated.
- Select the bill to which you want to allocate the unallocated payment.
- In the “Amount to be Allocated” section, enter the amount you wish to allocate. This will assign the specified payment amount to the selected bill.
- Once we assign cash or get to know the amount to be allocated to a specific purchase, click on the Submit button; automatically, the system will assign that payment to the specific bill.
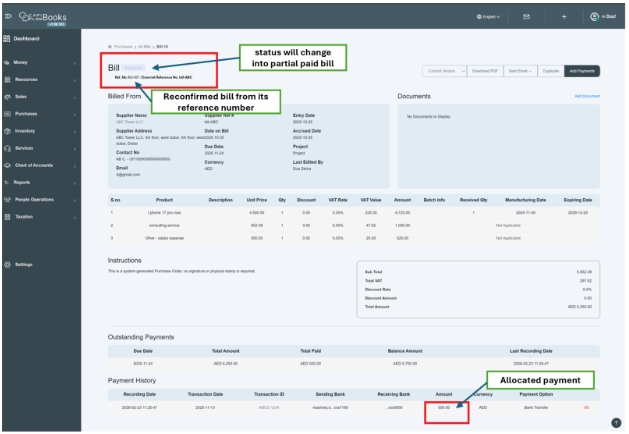
As soon as you click on the save button, the payment will disappear from the unallocated payment table and allocate to a specific bill amount.
Users can check that payment through specific bills as well as through supplier detail accounts like this.
Also, that unpaid bill will convert into partially paid bills.
Users can use the bill reference number to verify whether the payment has been successfully allocated to the relevant bill, ensuring accuracy and proper record management.
In payment history, you can check if this payment has been allocated to a specific bill.
- Alternative Method to Allocate Unallocated Payment from the Bill
There is another way to allocate an unallocated payment directly from the related bill using the Add Payment button available in the action bar.
- First, create the payment in the Payments section. If it is not allocated to any bill, it will appear as an Unallocated Payment.
- Go to the relevant bill and click on the Add Payment button in the action bar.
- A pop-up window will appear with multiple tabs, such as
- Add Payment
- Unallocated
- Debit Note
- Written Off
- Discount
- Click on the Unallocated tab. The system will display the payment you previously created in the Unallocated Payments section.
- Select the required unallocated payment.
- Click on the Save button.
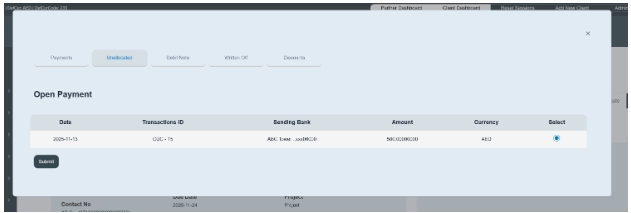
Once saved, the selected amount will be allocated to the bill, and the status will update accordingly.
- If you want to allocate unallocated payment against “paid bill”
If you need to allocate a payment to a bill that is already marked as Paid, you must first update the bill status.
- Go to the bill and remove (delete) the paid amount.
- This will change the bill status from Paid to Unpaid.
- Once the bill is marked as Unpaid, you can allocate the unallocated payment to the specific bill.
This process ensures that the payment is correctly reassigned and properly reflected in the system.
