
If You Don’t Find Your Supplier’s Company Name in PO
Write your required name in the given drop-down space, and then you can see there is an option below. i.e., “Add New” written in blue font. When you click on it, you can see a new page appear on your window. In this section, you will enter the supplier’s company information. There are some expandable sections given here.
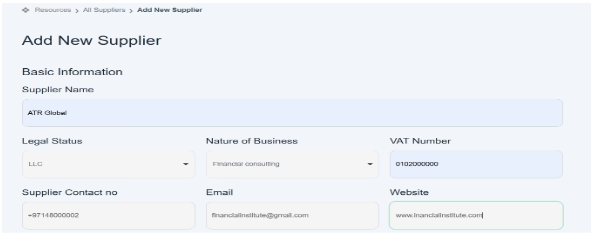
Basic information
- First you have the basic information section; click on the drop-down button located at the left side of the bar.
- Enter the supplier company name, e.g., ATR Global.
- Click and select the legal status of the supplier’s company. E.g., LLC, partnership, enterprise, government, etc.
- Click and select the nature of the company. E.g., financial institute
- Enter supplier contact number. e.g., +971 4 800 0002
- Enter the email address of the supplier’s company. E.g., financialinstitute@gmail.com.
- Enter the website of the supplier’s company. E.g., www.financialinstitute.com.
Click on Contact Person Details.
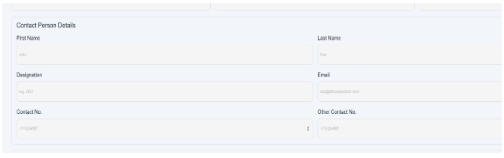
In this section you will enter supplier information. That individual’s information, who is responsible for communication.
- You have a contact person section; click on the drop-down and fill in the details.
- Enter the first name of the supplier. E.g., king
- Enter last name of supplier. E.g., Edward
- Enter the designation of the supplier person, e.g., CEO, CCO, manager, etc.
- Enter the email of the supplier. E.g., A@gmail.com
- Enter the contact number of the supplier, e.g., +97100000000.
- Enter the other person’s contact number too. E.g., +9719900000
Click on “Bank Details.”
In this section you will add bank details of the customer’s company.
- You will have a bank details option given in this section; click on the drop-down and fill in the details.
- Enter the client account title name, e.g., the company’s name, e.g., ATR Global.
- Sort the code/branch code given by the client. e.g., 012345
- Enter account number. e.g. AE000000000
- Enter the IBAN number. e.g. AEXXXXXXXXXXXX

If a user is not dealing with bank information or does not require this section, the system provides default general data (dummy data) for convenience.
This default data helps users proceed with payment procedures smoothly without the need to manually enter bank details. It ensures that the workflow remains uninterrupted while still allowing users to update the information later if needed.

Click on “Addresses.”
This section refers to the Address section; this section is mandatory to submit this information. Click on the drop-down and fill in the details. In this section you will add the addresses of the supplier’s company.
Here you have three type of addresses
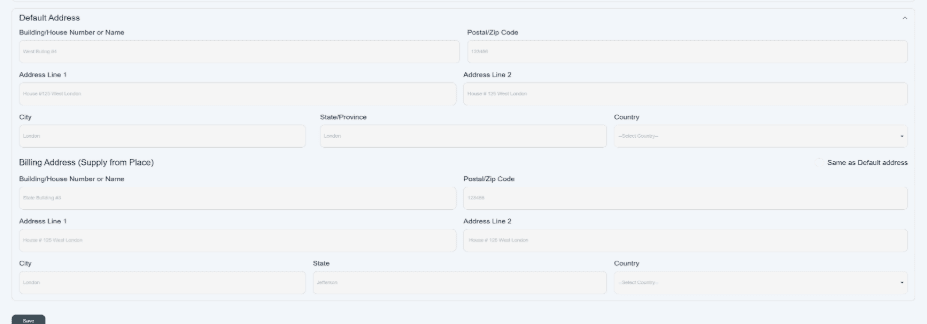
Default address
Delivery Address (Place of Supply)
Billing Address
Default address
This is the primary or registered address of the supplier.
- Enter Building/House Number or Name, e.g., East Building No. 5, ATR global
- Enter the correct postal/zip code in it. E.g., 122345.
- Enter the Address Line 1 & 2, e.g., add floor name, street name, block, building name area, etc., e.g., floor number 0, XX building, West Dubai
- Enter the city name, e.g., Dubai.
- Select or type the state or province. E.g., Dubai
- Choose the country from the dropdown list. E.g., UAE
Billing Address (Place of Supply)
Same as the Default Address section.
Checkbox: “Same as Default Address”—Tick this if the billing address is the same as the default one; it will auto-fill the details. If not, then enter like this as given below.
- Enter Building/House Number or Name, e.g., East Building No. 5, ATR global
- Enter the correct postal/zip code in it. E.g., 122345.
- Enter the Address Line 1 & 2, e.g., add floor name, street name, block, building name area, etc., e.g., floor number 0, XX building, West Dubai.
- Enter the city name, e.g., Dubai.
- Select or type the state or province. E.g., Dubai
- Choose the country from the dropdown list. E.g., UAE
- Once you’ve filled in all the details, then click on the submit button.
- You will land on the front screen of the supplier’s window.
- After saving, the new supplier appears in the List of Suppliers.
- Here you can see that, through this way, a supplier account could be created easily.
