
How to add new items/services in the item field
If you don’t find your product name or service name in the “Item” field, then write your product/service name in the given space, and then it shows you the option to add a new item or add a new service in blue font. Users can directly access the page where they can create things from here as well or directly go through their modules and create the required item. Now click on any option as per your needs.
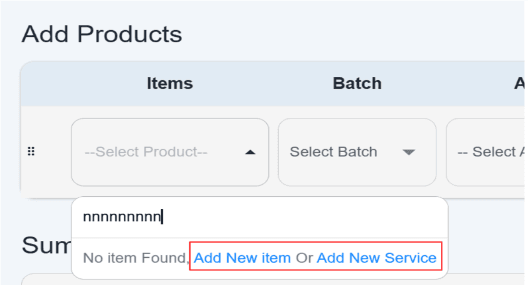
- Click on “Add New Product” option.
Once you click on the “add new product” option, it will open a new page. This page gives users access to add products into the inventory by filling out the necessary details related to product specifications and purchases.
Remember, you must already have the brand/group category exist in the brand list while adding new products.
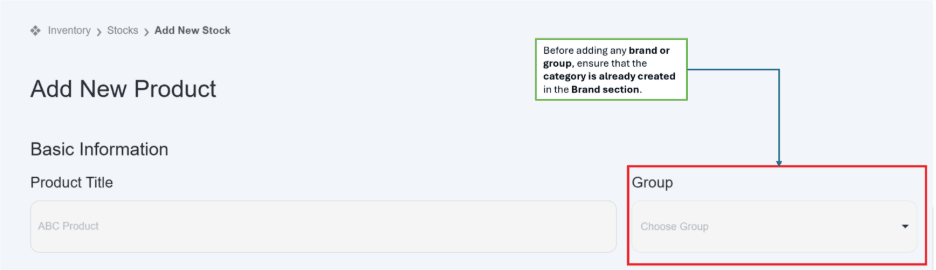
If the category is not created for adding products, then follow the instructions that are given below.
- How to add brand/group while adding a product
Navigation path: Inventory<brand< “Add brand/group” button
Click on “Add brand/Groups” button.
When you click on the Add New Brand Group button, it opens a new pop-up window in front of your screen.

- First enter the group title name in the given space. E.g., the group name is mobile.
- “Enter description” means mention a description related to the brand category. E.g., From where the product belongs, the user can write in it. (The description box is optional here).
- Below there are subsections given to add the same or sub-brand/group title.
- Write the same or subgroup title name in the title box and then mention any description related to product brand/group information.
- You can add in (+) or remove (-) more rows to add more groups.
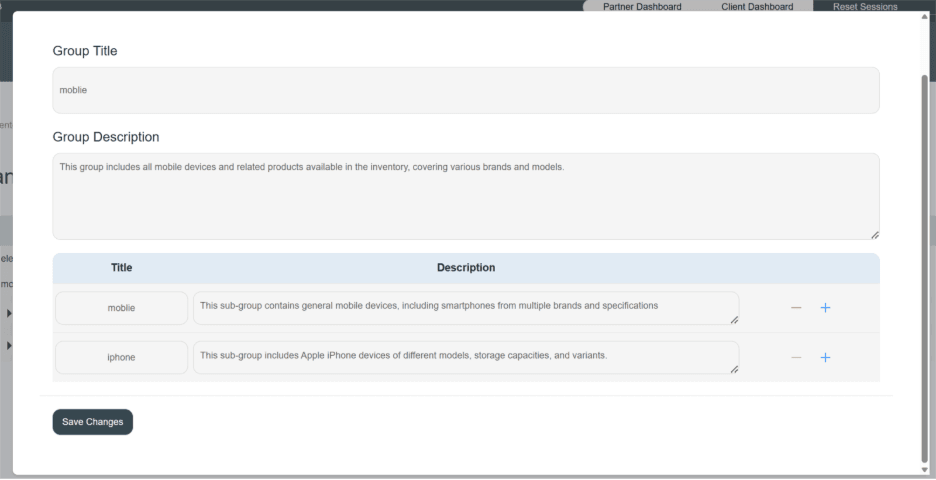
- Click on the save button. New brand/group titles shown in the existing brand list.
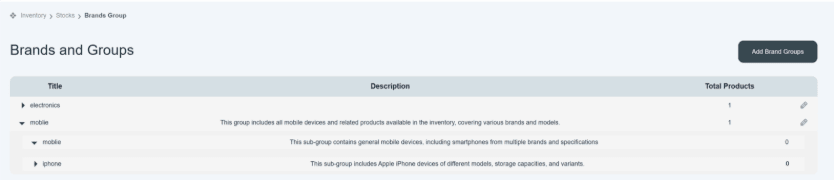
After creating the brand, refresh the page and go back to the stocks; head to “add new product.”
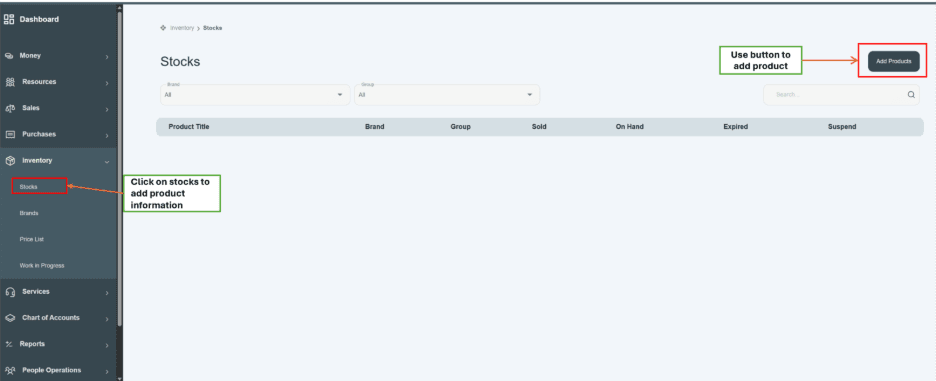
- How To Add Products to Stock
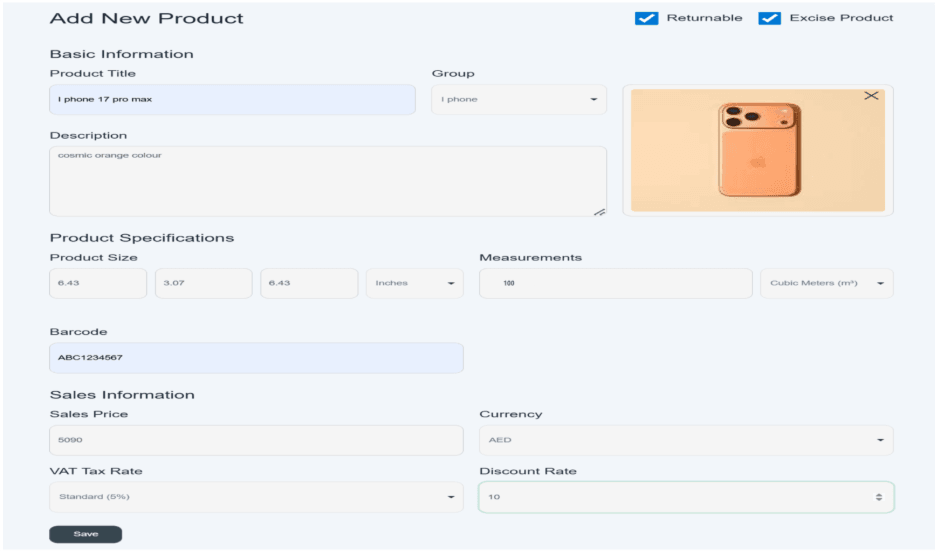
Basic Information
- First enter the product title, e.g., iPhone 17 Pro Max.
- “Enter product group” means the product group/category from the drop-down section. E.g., iPhone, mobile.
- Enter product description in given space. E.g., cosmic orange color.
Attached Picture:
- There is a block given on the right side of the page, in which you can drag and drop a picture of the product for the better understanding of the buyer. E.g., a picture of an iPhone 17 Pro Max.
Returnable option—click on the check box if your product is returnable.
Excise option—click on the excise option if your product falls under excise goods and requires tax reporting.
Product specification
- Enter product size, e.g., length is 6.43 inches.
- Enter product width, e.g. 3.07 inches.
- Enter product height, e.g., 6.43 inches.
- Enter select the measurement unit, e.g., inches.
- “Enter measurement of product” means volume of product. E.g., 111.5.
- Select the unit in which the volume of the product has been given. E.g., cubic meter (cm3)
- Enter the barcode of the product. E.g., ABC1234567.
Sale information
- Enter sale price of product. E.g., AED 5090.
- Enter the currency in which the buyer made payment. E.g., AED
- Click and select the VAT tax rate applied to the overall price of the product. E.g., Standard (5%)
- Enter the discount rate if it is provided by the supplier. E.g., 10%
- Once you enter all information, click on the save button, and your product information will be saved in the system.
Once you save the information, the new product appears in the list of stocks as well as under its relevant brand name.

Now go back to the invoice/bill page, where you want to enter the product in the item field.
Note: There is a condition applied: to book an invoice, the product name will appear in the drop-down list of the item field only when its bill and batch information has been recorded in the system.
- How to add new service
First, you have to create a department. Follow the steps that are given below.
How to Add Department
Go and click on the department subhead, located in the service module. Click on it, and it will take you to a department window where you can add a new department.
There is a button located on the top right side of the page, i.e., Add Department.
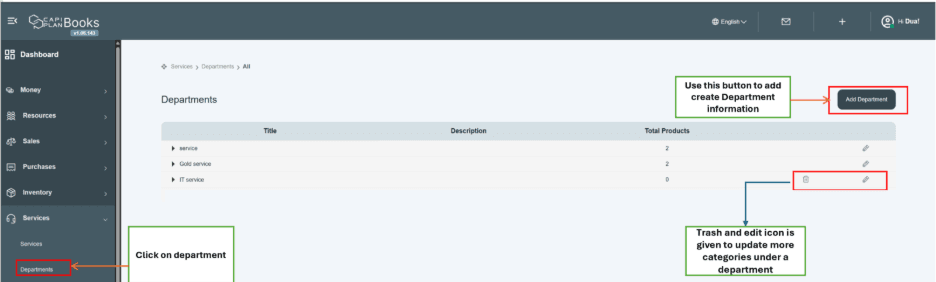
Click On the “Add Department” Button.
When you click on the Add New Department option, it opens up a pop-up window in front of your screen.
- First enter the department title, name, or group name to which the service belongs in the given space. E.g., IT Service department.
- Enter a general description in it related to the service.
E.g., from where the service belongs, the user can write in it. (The description box is optional here).
- Below there is a table given; you can add a subcategory in it. Write the sub-department name in it. E.g., Internet service department.
- Mention any description related to the subhead department.
- You can remove (-) or add (+) more subrows under a specific head.
- Click on the Save Button to save the information successfully.
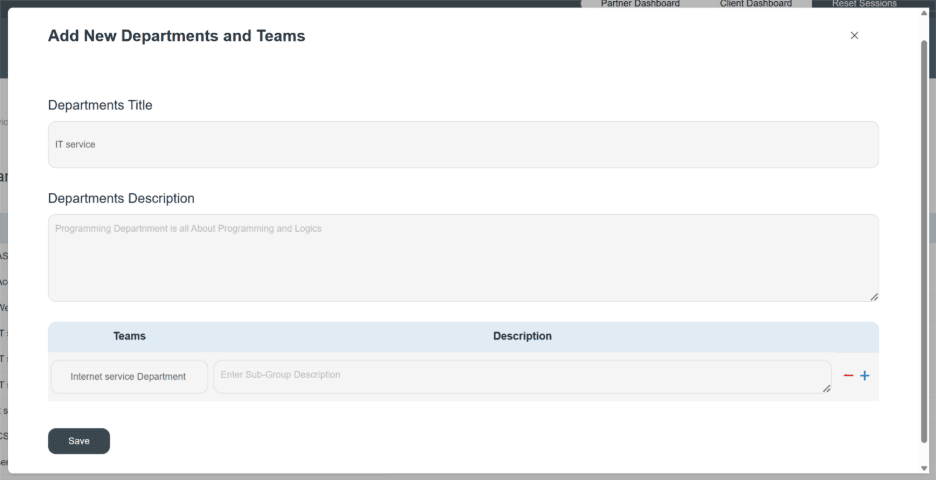
Once you save the information, the new department title is shown in the existing list.
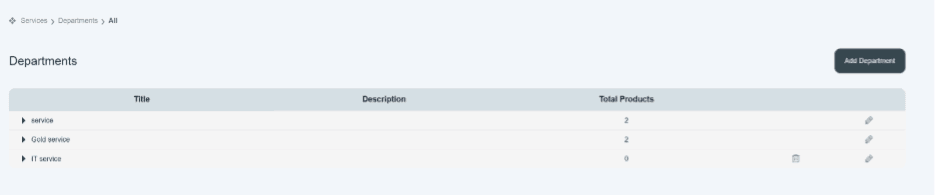
Then come back to the service module, refresh the page, and click on it. There is a button located on the top, i.e., the Add Service button.
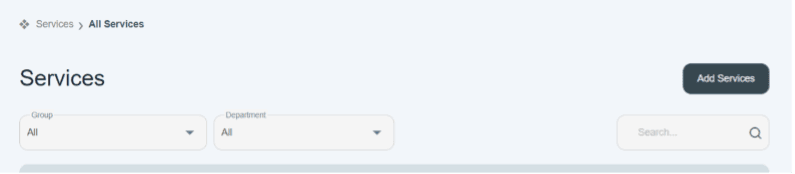
Click on this button; it will show you a new pop-up window.
This page allows a user to create service information such as basic information, sale information, and VAT information.
Basic Information
- First enter the service title, e.g., Sky Connect.
- Click and select the Department group from the drop-down section.
- Enter the service description in the given space. E.g., IT service has been provided for the last 3 years.
Sale information
- Enter the sale price of the product. E.g., AED 4500
- Enter the currency in which the buyer made payment. E.g., AED
- Click and select the VAT tax rate applied on the service. E.g., Standard (5%)
- Enter the discount rate. (if provided). Let’s say 10%.
- After entering all information in it. Click on the Save button.
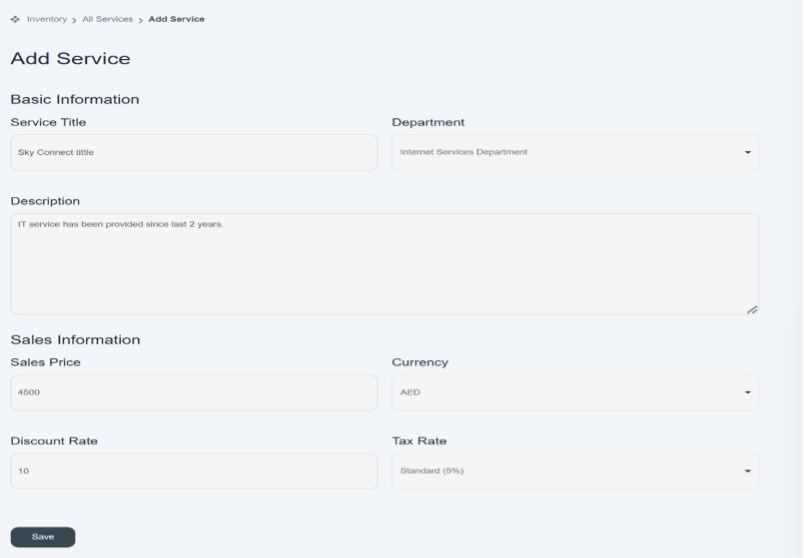
- Once you enter all information, click on the save button, and your service information will be saved in the system and displayed on the main list of service.
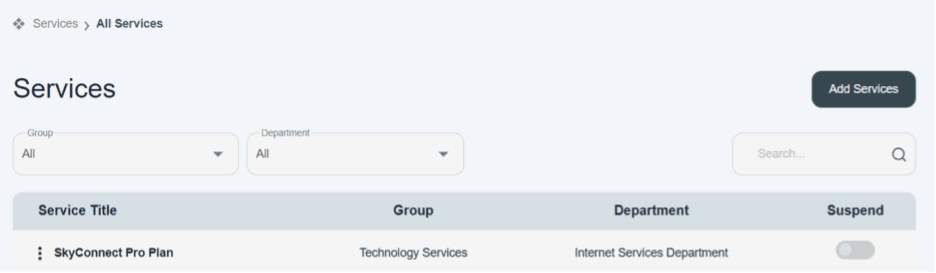
Now go back to the invoice and then enter your service name; this time you get your service name in the given item list.
